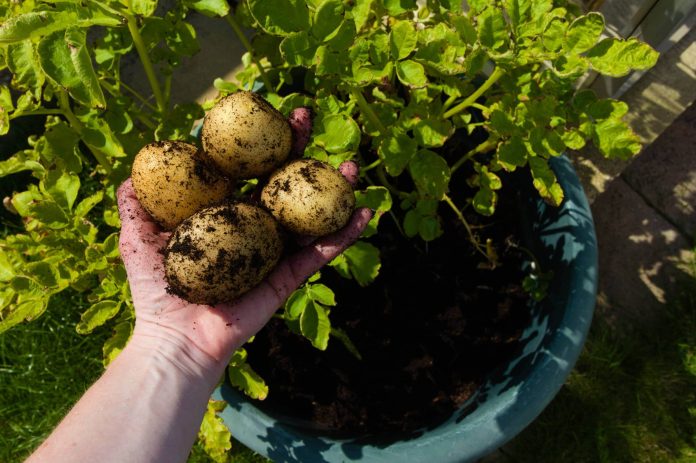
It’s possible to get a lot of enjoyment out of raising your own potatoes at home. Container gardening is an easy way to grow this flexible and healthy crop, regardless of the size of your yard or balcony. From choosing the best potato kinds to harvesting your own tasty homegrown tubers, we’ll cover it all in this post.
1- Choosing Right Potato Varieties
Choose potato cultivars for container gardening based on their ability to thrive in confined settings and their maturity time. Fingerling potatoes, Yukon Gold potatoes, and Red Norland potatoes are all good options. These cultivars are productive and easy to grow in pots.
2- Selecting Containers
If you want to cultivate potatoes, you should use pots that are at least 10 to 15 inches deep. You can use everything from cheap buckets and cloth grow bags to wooden crates and even specialized potato grow bags. Make sure the containers you choose have drainage holes to avoid flooding.
3- Preparing Seed Potatoes
A good place to start is to buy certified seed potatoes. Store-bought potatoes could be contaminated, so it’s best to pass on them. A few weeks before planting, put the seed potatoes in a cool, dry, and bright spot to promote sprouting. Smaller portions of seed potatoes with at least one “eye” or sprout should be cut from larger ones.
4- Planting
Stuff the pots with a potting mix or a compost-and-soil mixture that drains nicely. The seed potatoes should be planted with the sprouts facing up, about four to six inches deep. Put them at least 8 inches apart to give each item room to flourish.
5- Care and Maintenance
- Watering: Don’t let the soil become too wet, but don’t let it dry out either. Overwatering might cause rotting, so be careful. When the top inch of soil dries out, it’s time to water.
- Fertilizing: To put it simply, potatoes require a lot of food. Think about amending the soil with compost or a balanced, slow-release fertilizer before planting. As the plants expand, side-dress them with extra fertilizer.
- Sunlight: Put your pots somewhere that will get at least six to eight hours of sunlight daily. Indoor potato cultivation benefits from the use of grow lights.
6- Managing Growth
Stems and leaves will form on the potato plants as they mature. After the plants have grown 6-8 inches tall, it is time to start “hilling.” To prevent the tubers from turning green and harmful from exposure to sunlight, gently mound earth or straw around the stems.
7- Pests and Diseases
Check for unwanted visitors like slugs, snails, and aphids. If you notice any signs of damage, use insecticidal soap or natural predators to save your plants. Diseases that are carried by the soil can be avoided by rotating crops every year.
8- Harvesting
Once the flowers have faded and the foliage has turned yellow and died back, the potatoes are ready to be picked. Extraction of potatoes from the ground requires cautious digging. You can choose “new potatoes” before the plants have died back entirely, or you can wait for the larger, mature potatoes to develop after the plants have died.
9- Storing Your Harvest
Potatoes should be allowed to dry in a cool, dark spot for a few hours after harvesting, after which any excess soil should be carefully brushed off. To extend their shelf life, keep them in a cool, humid, and dark place like a root cellar or basement.
It’s rewarding to grow your own potatoes at home in pots so you can eat a healthy, locally sourced crop. Potatoes can be grown effectively even in small places with the correct cultivars, containers, and care. Planting, caring for, and harvesting potatoes can give you a rewarding experience and a substantial crop whether you’re an experienced gardener or just starting out.


